Rest / GraphQL quickstart
In this quick start guide, we will write our first script in Rest & GraphQL.
This tutorial covers how to create a simple script through Windmill web IDE. See the dedicated page to develop scripts locally.
Scripts are the basic building blocks in Windmill. They can be run and scheduled as standalone, chained together to create Flows or displayed with a personalized User Interface as Apps.
Scripts consist of 2 parts:
- Code.
- Settings: settings & metadata about the Script such as its path, summary, description, JSON Schema of its inputs (inferred from its signature).
When stored in a code repository, those 2 parts are stored separately at <path>.rest and <path>.script.yaml.
Below is a simple example of a script built in Rest with Windmill:
export async function main() {
	const res = await fetch('https://api.supabase.com/v1/organizations', {
		headers: {
			Authorization: `Bearer <your_supabase_token>`,
			'Content-Type': 'application/json'
		}
	});
	return res.json();
}
Settings

As part of the settings menu, each script has metadata associated with it, enabling it to be defined and configured in depth.
- Summary (optional) is a short, human-readable summary of the Script. It will be displayed as a title across Windmill. If omitted, the UI will use the
pathby default. - Path is the Script's unique identifier that consists of the script's owner, and the script's name. The owner can be either a user, or a group (folder).
- Description is where you can give instructions through the auto-generated UI to users on how to run your Script. It supports markdown.
- Language of the script.
- Script kind: Action (by default), Trigger, Approval, Error handler or Preprocessor. This acts as a tag to filter appropriate scripts from the flow editor.
This menu also has additional settings on Runtime, Generated UI and Triggers.
Now click on the code editor on the left side.
Code
Windmill provides an online editor to work on your Scripts. The left-side is the editor itself. The right-side previews the UI that Windmill will generate from the Script's signature - this will be visible to the users of the Script. You can preview that UI, provide input values.

Rest
As we picked Rest for this example, Windmill provided some boilerplate. Let's take a look:
//native
//you can add proxy support using //proxy http(s)://host:port

// native scripts are bun scripts that are executed on native workers and can be parallelized
// only fetch is allowed, but imports will work as long as they also use only fetch and the standard lib

//import * as wmill from "windmill-client"

export async function main(example_input: number = 3) {
  // "3" is the default value of example_input, it can be overridden with code or using the UI
  const res = await fetch(`https://jsonplaceholder.typicode.com/todos/${example_input}`, {
    headers: { "Content-Type": "application/json" },
  });
  return res.json();
}
Rest scripts are in fact Bun TypeScript fetches. They support all the normal signatures of normal TypeScript but only stdlib JavaScript, and the fetch operations (including fetch operations from npm packages and relative imports). For example, the full wmill API is supported, just use:
import * as wmill from './windmill.ts'
The // native header line will help Windmill automatically convert between 'nativets' and 'bun' scripts based on the presence of this header so you can always just pick TypeScript (Bun) and decide at the end if you want to accelerate it with 'native' if possible.
The REST button simply prefills a Bun script with a //native header.
Fetches can also be done through a regular TypeScript in Windmill (without the //native header), but opting for dedicated Rest scripts
benefits from a highly efficient runtime.
Available web-platform globals
Native scripts run in an efficient in-process runtime that only allows fetch and the JavaScript standard library. On top of the standard lib, that runtime exposes the standard web-platform globals, matching the Bun runner's surface, so code relying on them behaves the same whether it runs as a native or Bun script:
- Text encoding:
TextEncoder,TextDecoder,TextEncoderStream,TextDecoderStream - Streams:
ReadableStream,WritableStream,TransformStream(with their reader/controller types and theByteLengthQueuingStrategy/CountQueuingStrategyqueuing strategies) - Events:
Event,EventTarget,CustomEvent,MessageEvent,CloseEvent,ErrorEvent,reportError - Messaging:
MessageChannel,MessagePort - Compression:
CompressionStream,DecompressionStream - Files and cloning:
File,structuredClone - URL matching:
URLPattern - Timing:
performance(includingperformance.now()andperformance.timeOrigin) DOMException
So expressions like res.body instanceof ReadableStream or new TextEncoder().encode(...) now work in native scripts just as they do in Bun.
Replace the <jsonplaceholder> URL with the API endpoint of your choice and customize the headers object according to your fetch requirements.
REST scripts benefit from the auto-generated UI capabilities of any Windmill script.
The arguments of the main function are used for generating 1. the input spec of the Script,
and 2. the frontend that you see when running the Script as a standalone app.
Type annotations are used to generate the UI form, and help pre-validate
inputs. While not mandatory, they are highly recommended. You can customize the UI in later steps (but not change the input type!).
This is also a way to have users fill resources or variables through the auto-generated UI. The UI is available in the script editor to test your code:
In the example above, a custom resource is declared as a parameter of the main function. It will be asked by the user through the auto-generated UI and used directly in the script (here for the bearer token).
If the endpoint is and HTTPS endpoint exposing custom certificate, the fetch will fail. Custom certificates can be trusted using the DENO_CERT env variable (see Deno official documentation)
GraphQL
As we picked GraphQL for this example, Windmill provided some boilerplate. Let's take a look:
query($name1: String, $name2: Int, $name3: [String]) {
	demo(example_name_1: $name1, example_name_2: $name2, example_name_3: $name3) {
		example_name_1,
		example_name_2,
		example_name_3
	}
}
The query itself is similar to any GraphQL query.
To trigger each GraphQL script, an input named 'api' will be required. This is a GraphQL resource defined by the JSON schema:
{
    "type": "object",
    "$schema": "https://json-schema.org/draft/2020-12/schema",
    "required": [
        "base_url"
    ],
    "properties": {
        "base_url": {
            "type": "string",
            "format": "uri",
            "default": "",
            "description": ""
        },
        "bearer_token": {
            "type": "string",
            "default": "",
            "description": ""
        },
        "custom_headers": {
            "type": "object",
            "description": "",
            "properties": {},
            "required": []
        }
    }
}
Resources are rich objects in JSON that allow to store configuration and credentials. They can be saved, named, and shared within Windmill to control and streamline the execution of GraphQL scripts.
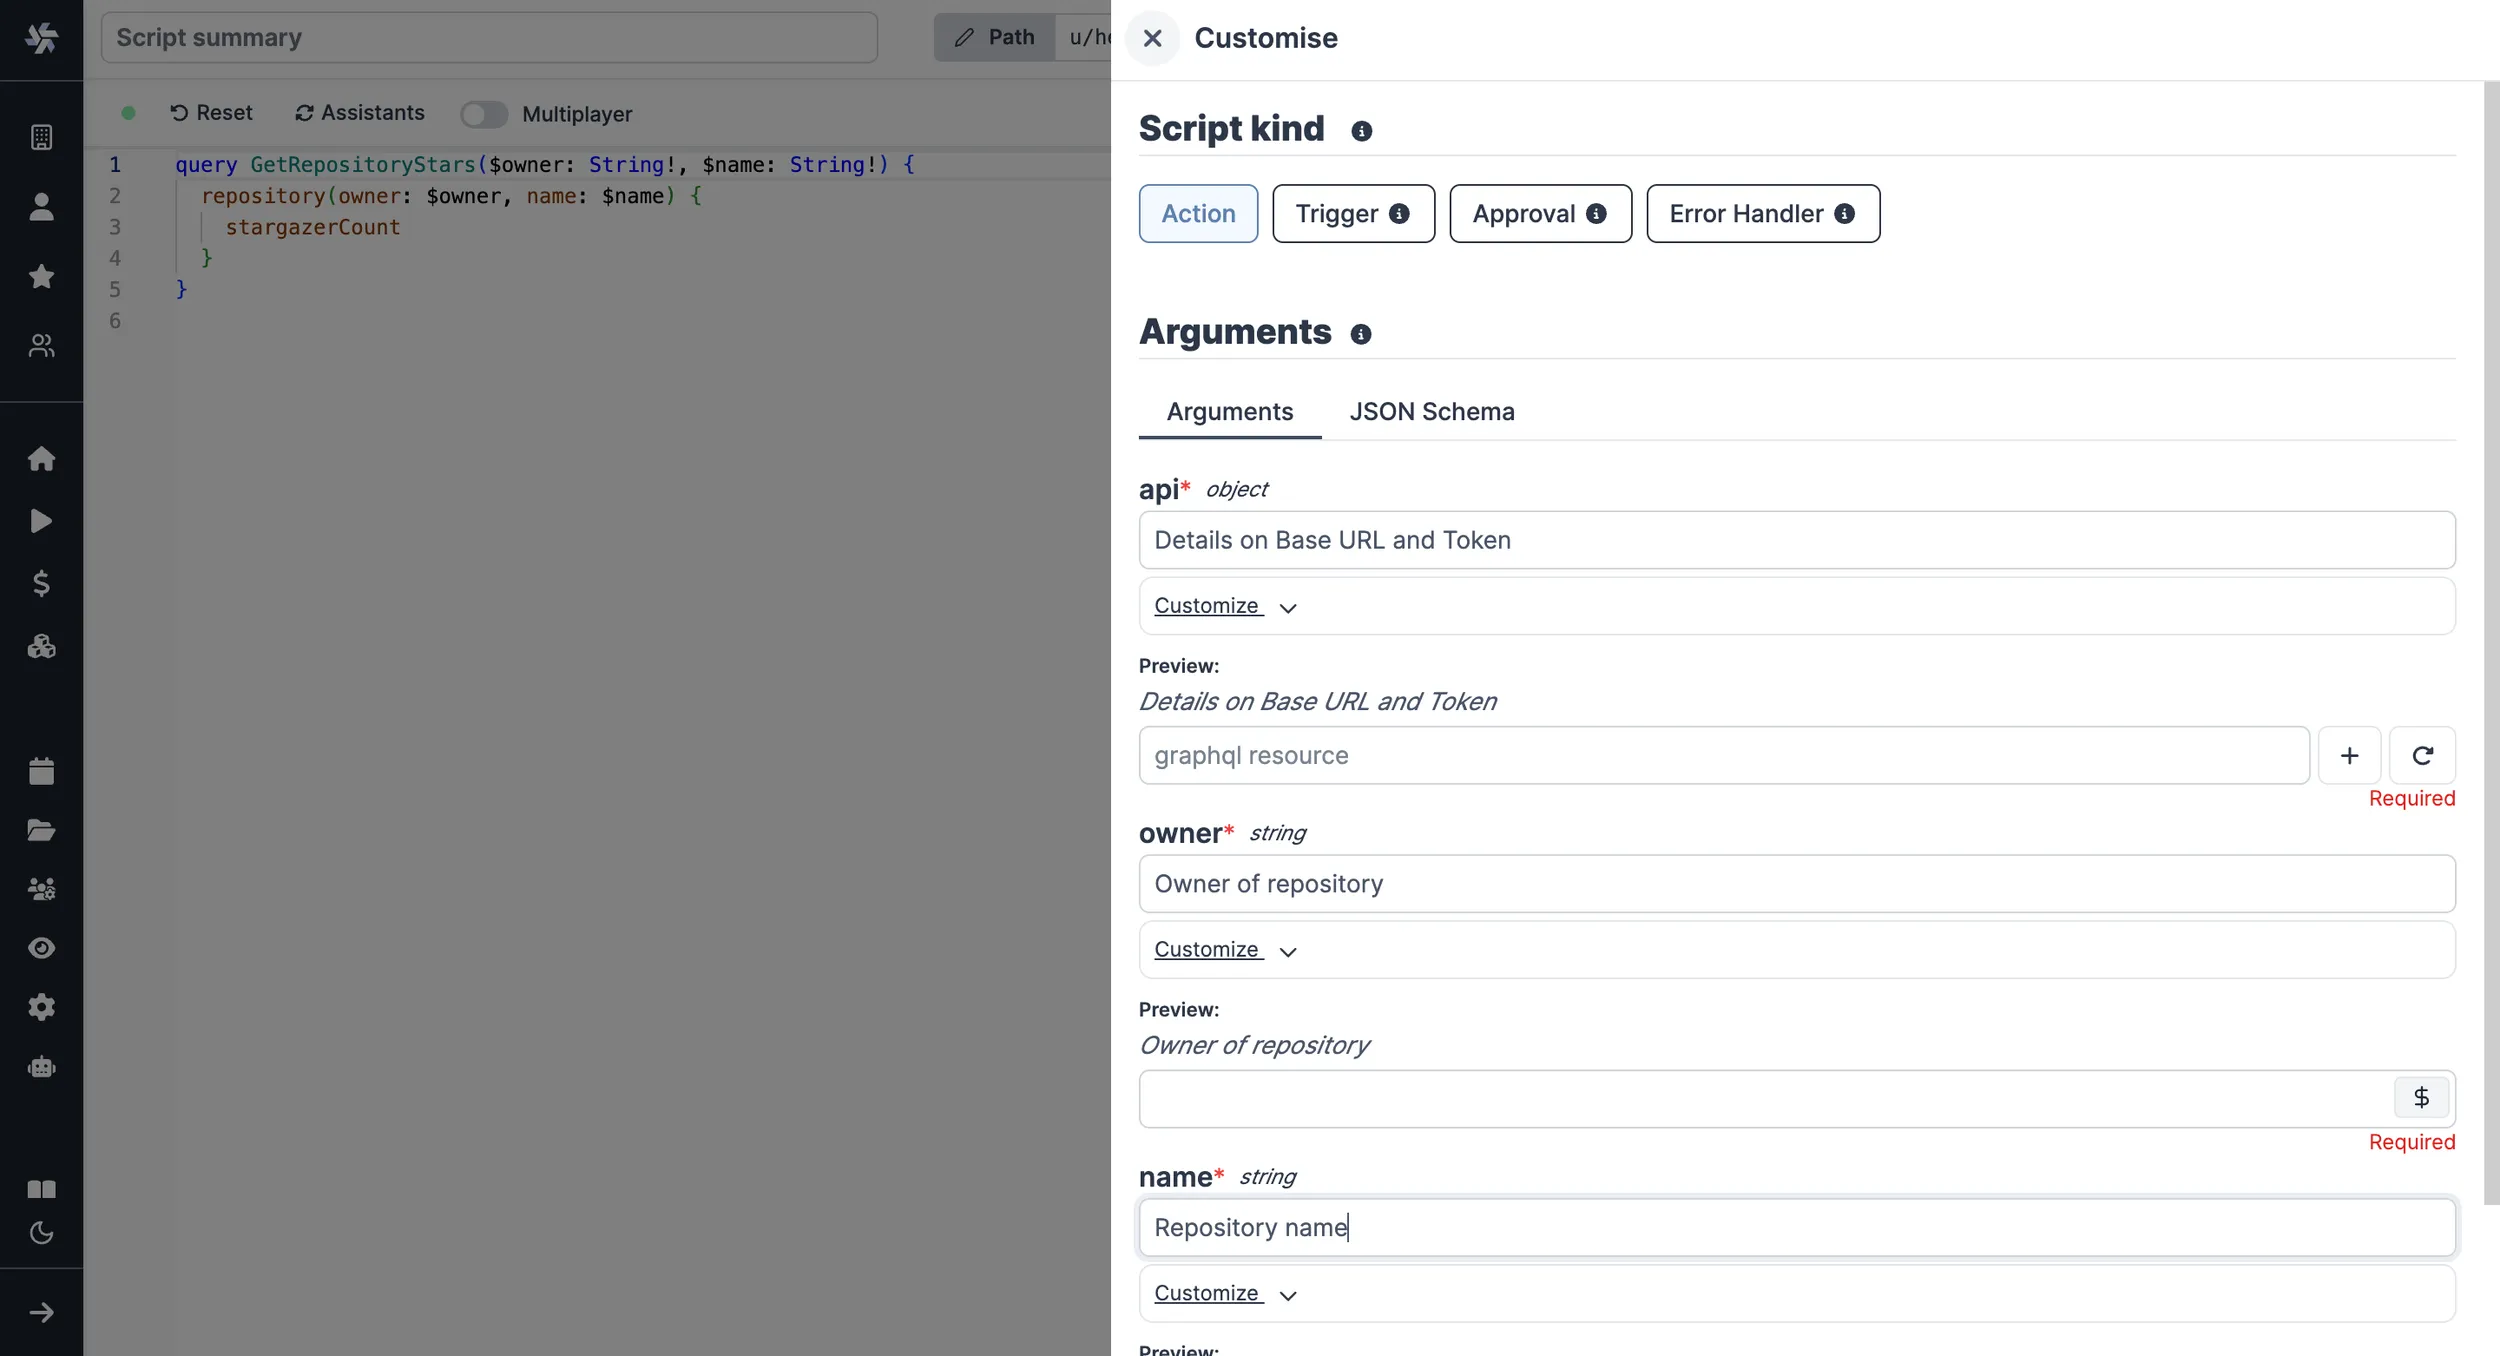
The arguments of the query will be used for generating 1. the input spec of the Script, and 2. the frontend that you see when running the Script with an auto-generated UI. Type annotations are used to generate the UI form, and help pre-validate inputs. While not mandatory, they are highly recommended. You can customize the UI in later steps (but not change the input type).
The UI is available in the script editor to test your code:
In the example above, a GraphQL resource is used with details on base URL and bearer token. Also was used the auto-generated UI to fill the argument
login.
Generated UI
From the Settings menu, the "Generated UI" tab lets you customize the script's arguments.
The UI is generated from the Script's main function signature, but you can add additional constraints here. For example, we could use the Customize property: add a regex by clicking on Pattern to make sure users are providing a name with only alphanumeric characters: ^[A-Za-z0-9]+$. Let's still allow numbers in case you are some tech billionaire's kid.
Run!
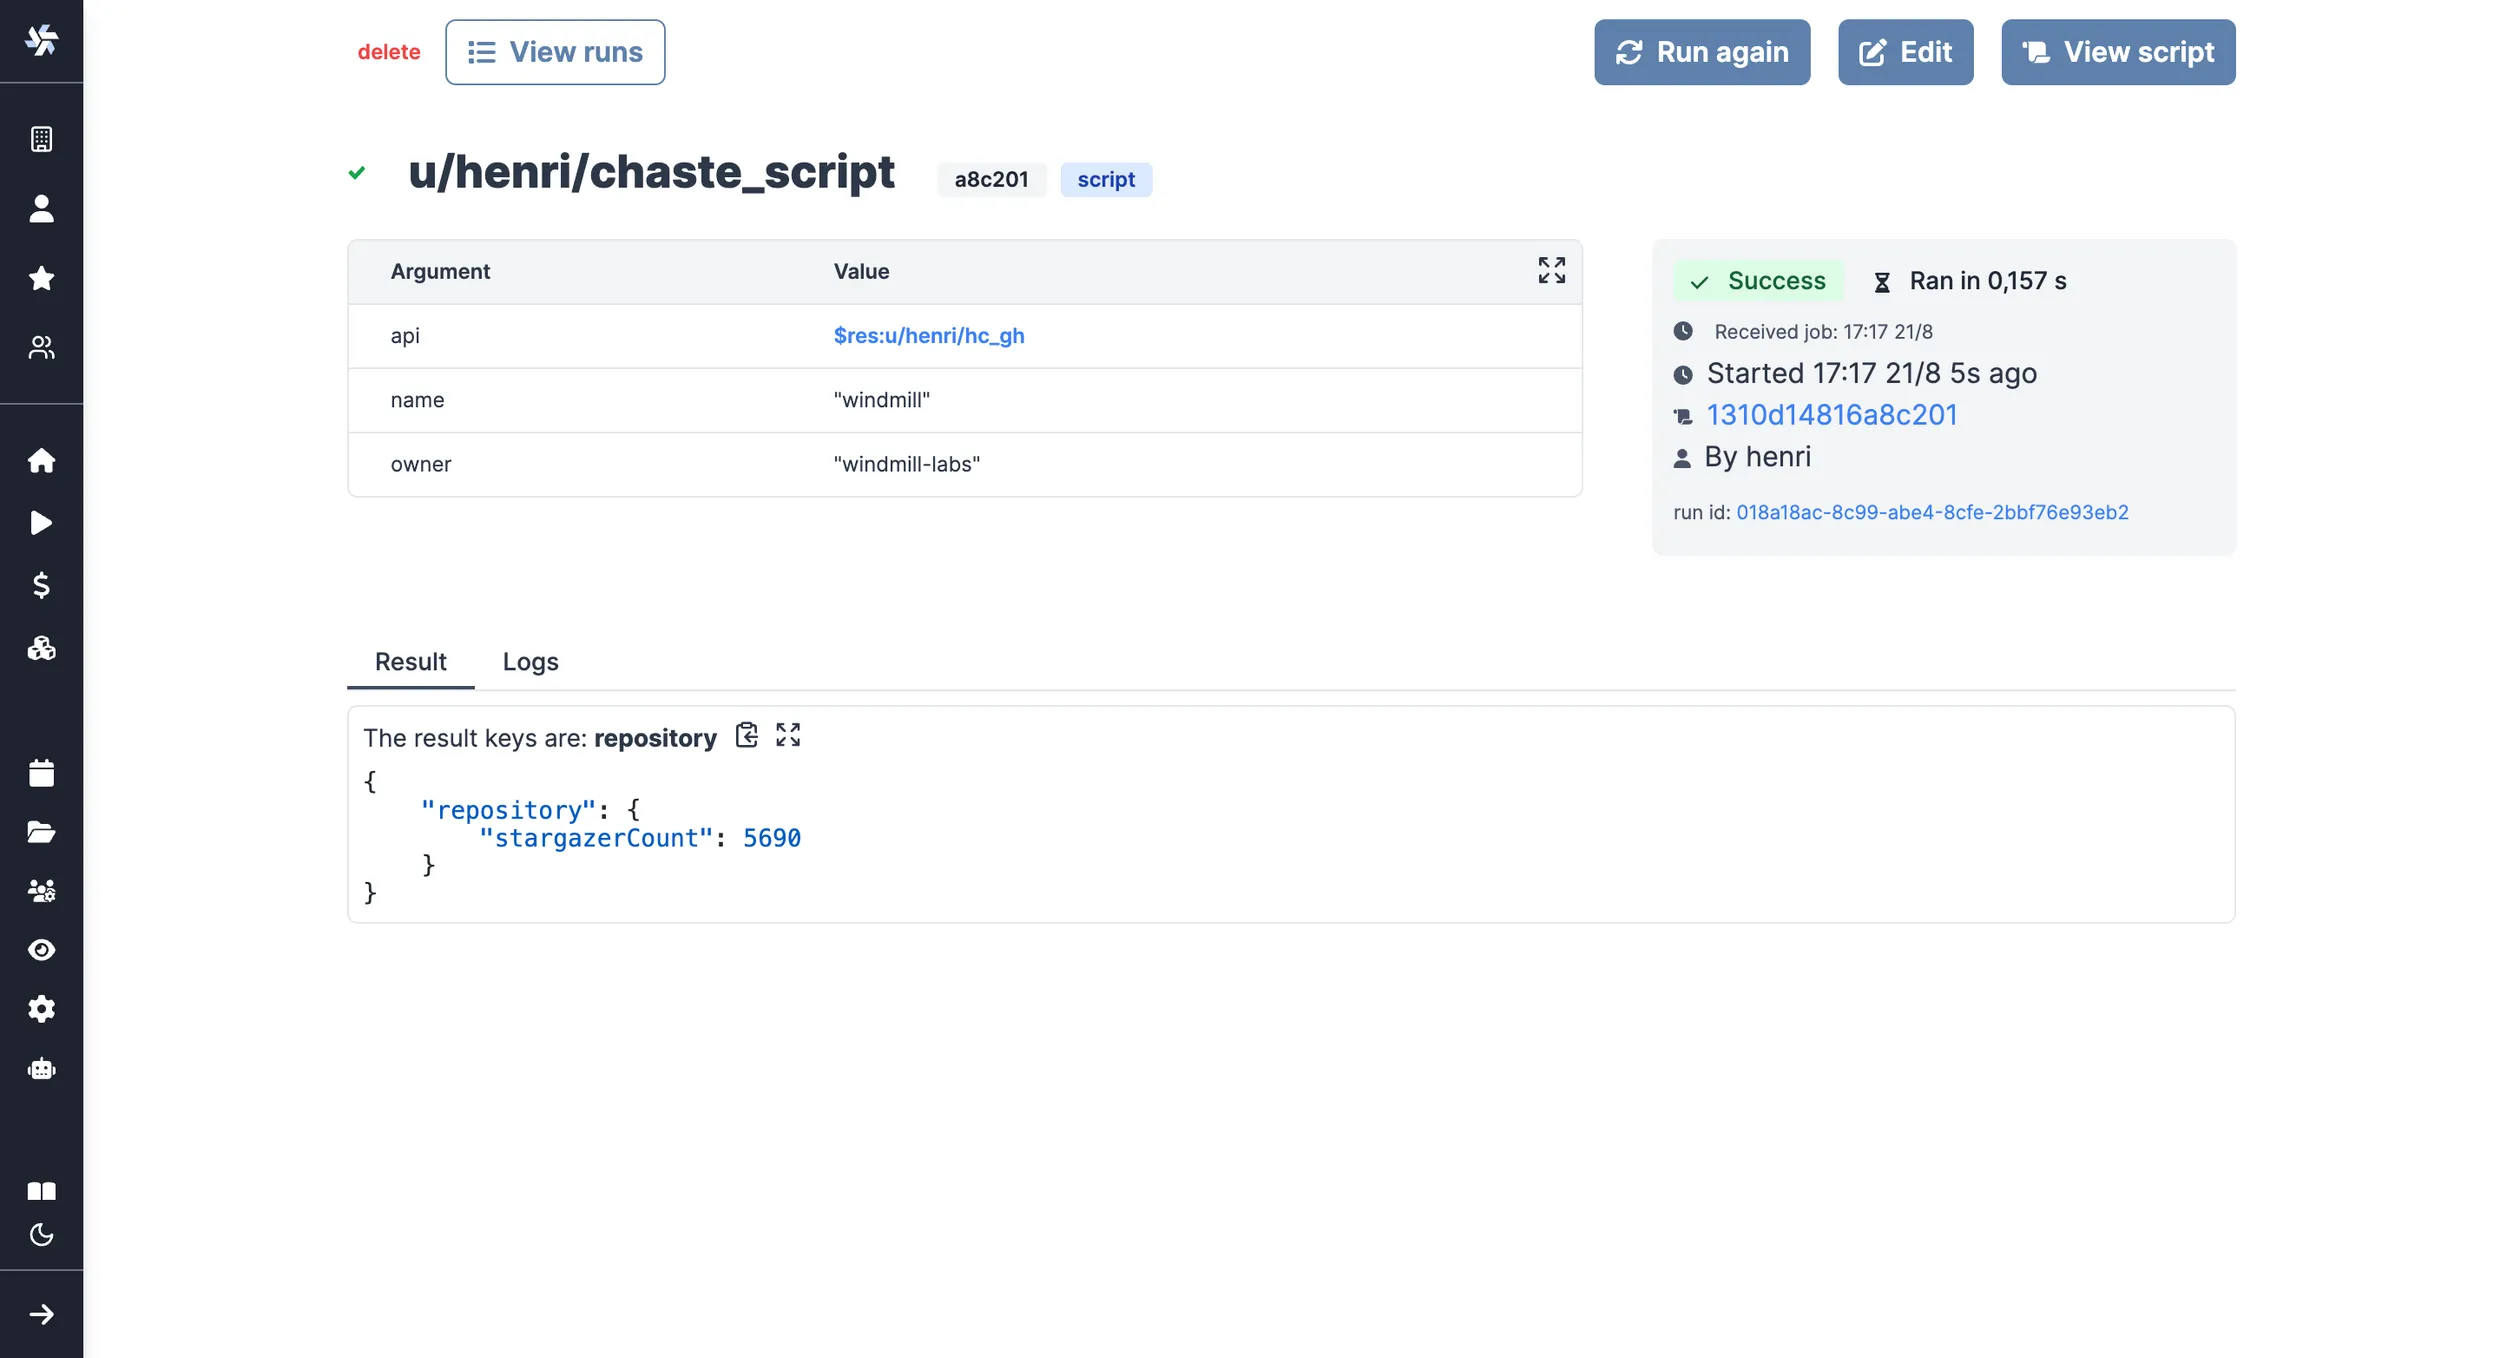
We're done! Now let's look at what users of the script will do. Click on the Deploy button to load the script. You'll see the user input form we defined earlier.
Note that Scripts are versioned in Windmill, and each script version is uniquely identified by a hash.
Fill in the input field, then hit "Run". You should see a run view, as well as your logs. All script runs are also available in the Runs menu on the left.
You can also choose to run the script from the CLI with the pre-made Command-line interface call.
What's next?
This script is a minimal working example, but there's a few more steps that can be useful in a real-world use case:
- Pass variables and secrets to a script.
- Connect to resources.
- Trigger that script in many ways.
- Compose scripts in Flows, low-code apps or full-code apps.
- You can share your scripts with the community on Windmill Hub. Once submitted, they will be verified by moderators before becoming available to everyone right within Windmill.
Scripts are immutable and there is an hash for each deployment of a given script. Scripts are never overwritten and referring to a script by path is referring to the latest deployed hash at that path.
For each script, a UI is autogenerated from the JSON schema inferred from the script signature, and can be customized further as standalone or embedded into rich UIs using the App builder.
In addition to the UI, sync and async webhooks are generated for each deployment.