Deploy to prod using the UI
Per item deploy
From a workspace in Windmill, you can deploy a item and all its dependencies to another workspace. This is a natural way of implementing staging/prod. This feature is available for Cloud plans and Self-Hosted Enterprise Edition only.
For all details on Deployments to prod in Windmill, see Deploy to prod.
The Draft and deploy is another feature that offers a lightweight solution for implementing a staging and production workflow, suitable for various scenarios.
How it works
A workspace deploys into its parent workspace: a workspace fork deploys into the workspace it was forked from, and a dev workspace deploys into the prod workspace it is paired with. Create a fork or pair a dev workspace to get a deployment target - there is no separate setting to link two unrelated workspaces.
The parent workspace can for example be:
- a Prod workspace, paired with a dev or staging workspace where scripts and flows are edited and tested first
- a workspace the changes of a short-lived fork are merged back into.
A workspace with no parent has nothing to deploy into: the deploy drawer shows Staging/Prod deploy not set up, and the fix is to pair it, not to fill in a target. See upgrading from the deploy target setting if you used the Deployment UI settings tab before Windmill 1.776.0.
Items that can be deployed are:
Workspace admins can filter out each of these types, and restrict deployment to given paths, from Workspace settings -> Dev workspace (this section used to be a separate "Deployment UI" tab).
Then, from the workspace, on the ⋮ menu of each deployed script or flow, pick "Deploy to staging/prod". This can be done also from the Resources and Variables menus or directly from a script or flow Details page.
This can be done by users with both View rights on the deployed-from workspace and edit rights on the deployed-to workspace.
You can deploy one by one flows, scripts (including each script within flow), variables and resources. Or toggle more than one and "Deploy all".
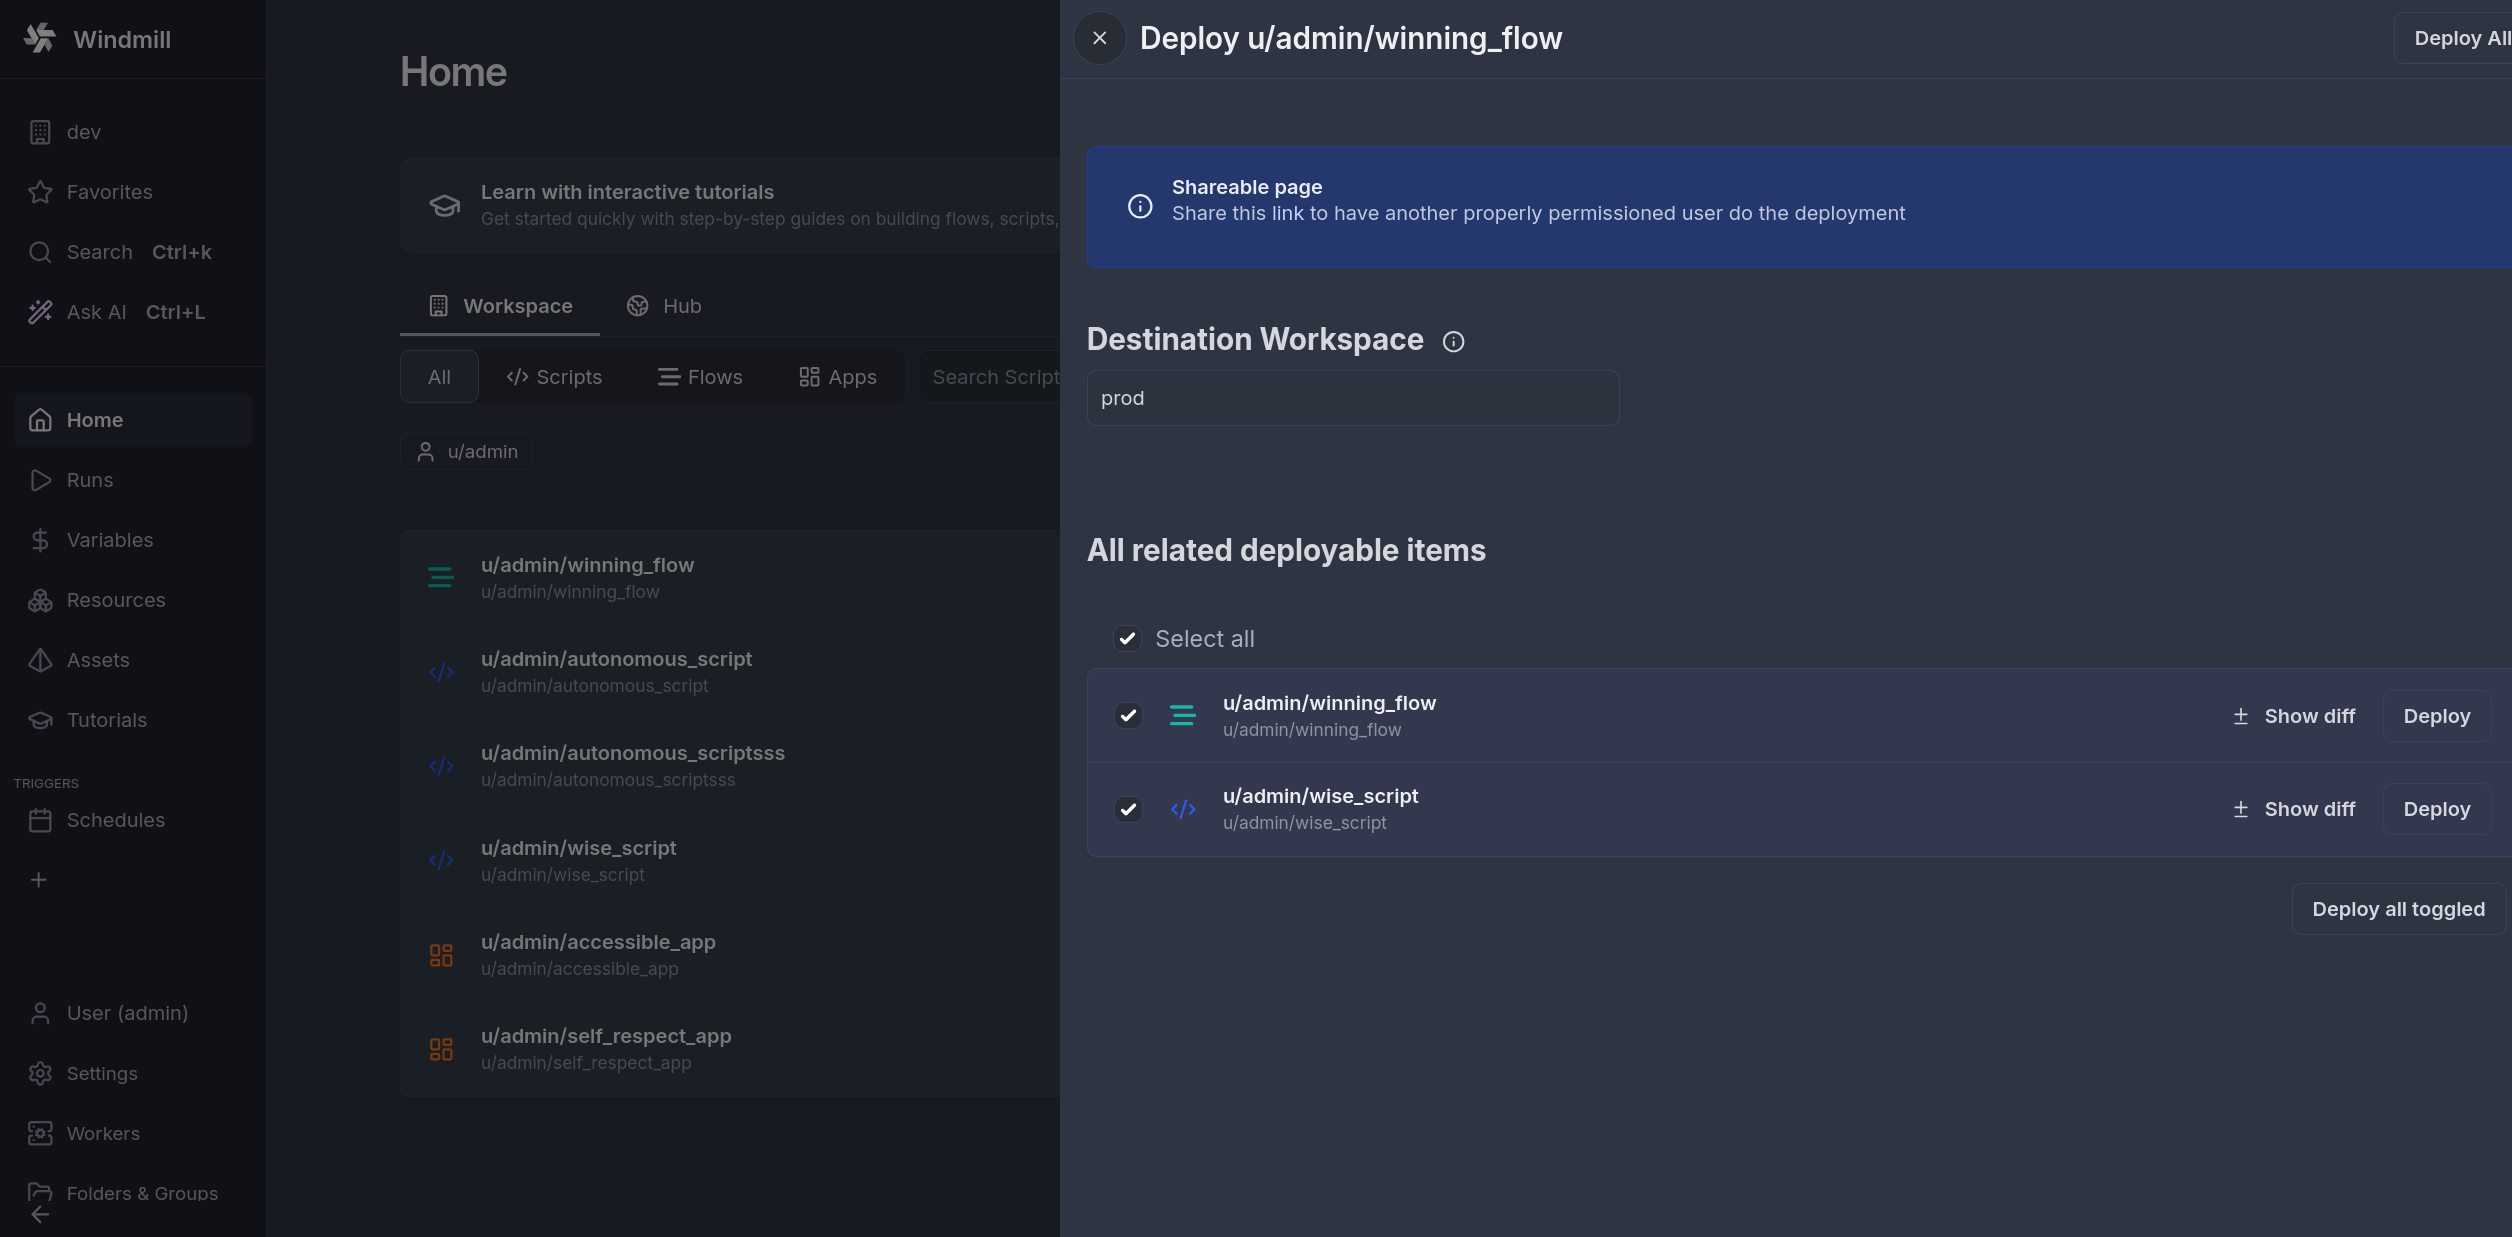
Items are called:
- "Missing" if not yet present in the deployed workspace.
- "New" if the item will be created with the deployment.
- "diff" if the item was already deployed previously. This opens a difference viewer tab where you can see differences with the previous version.
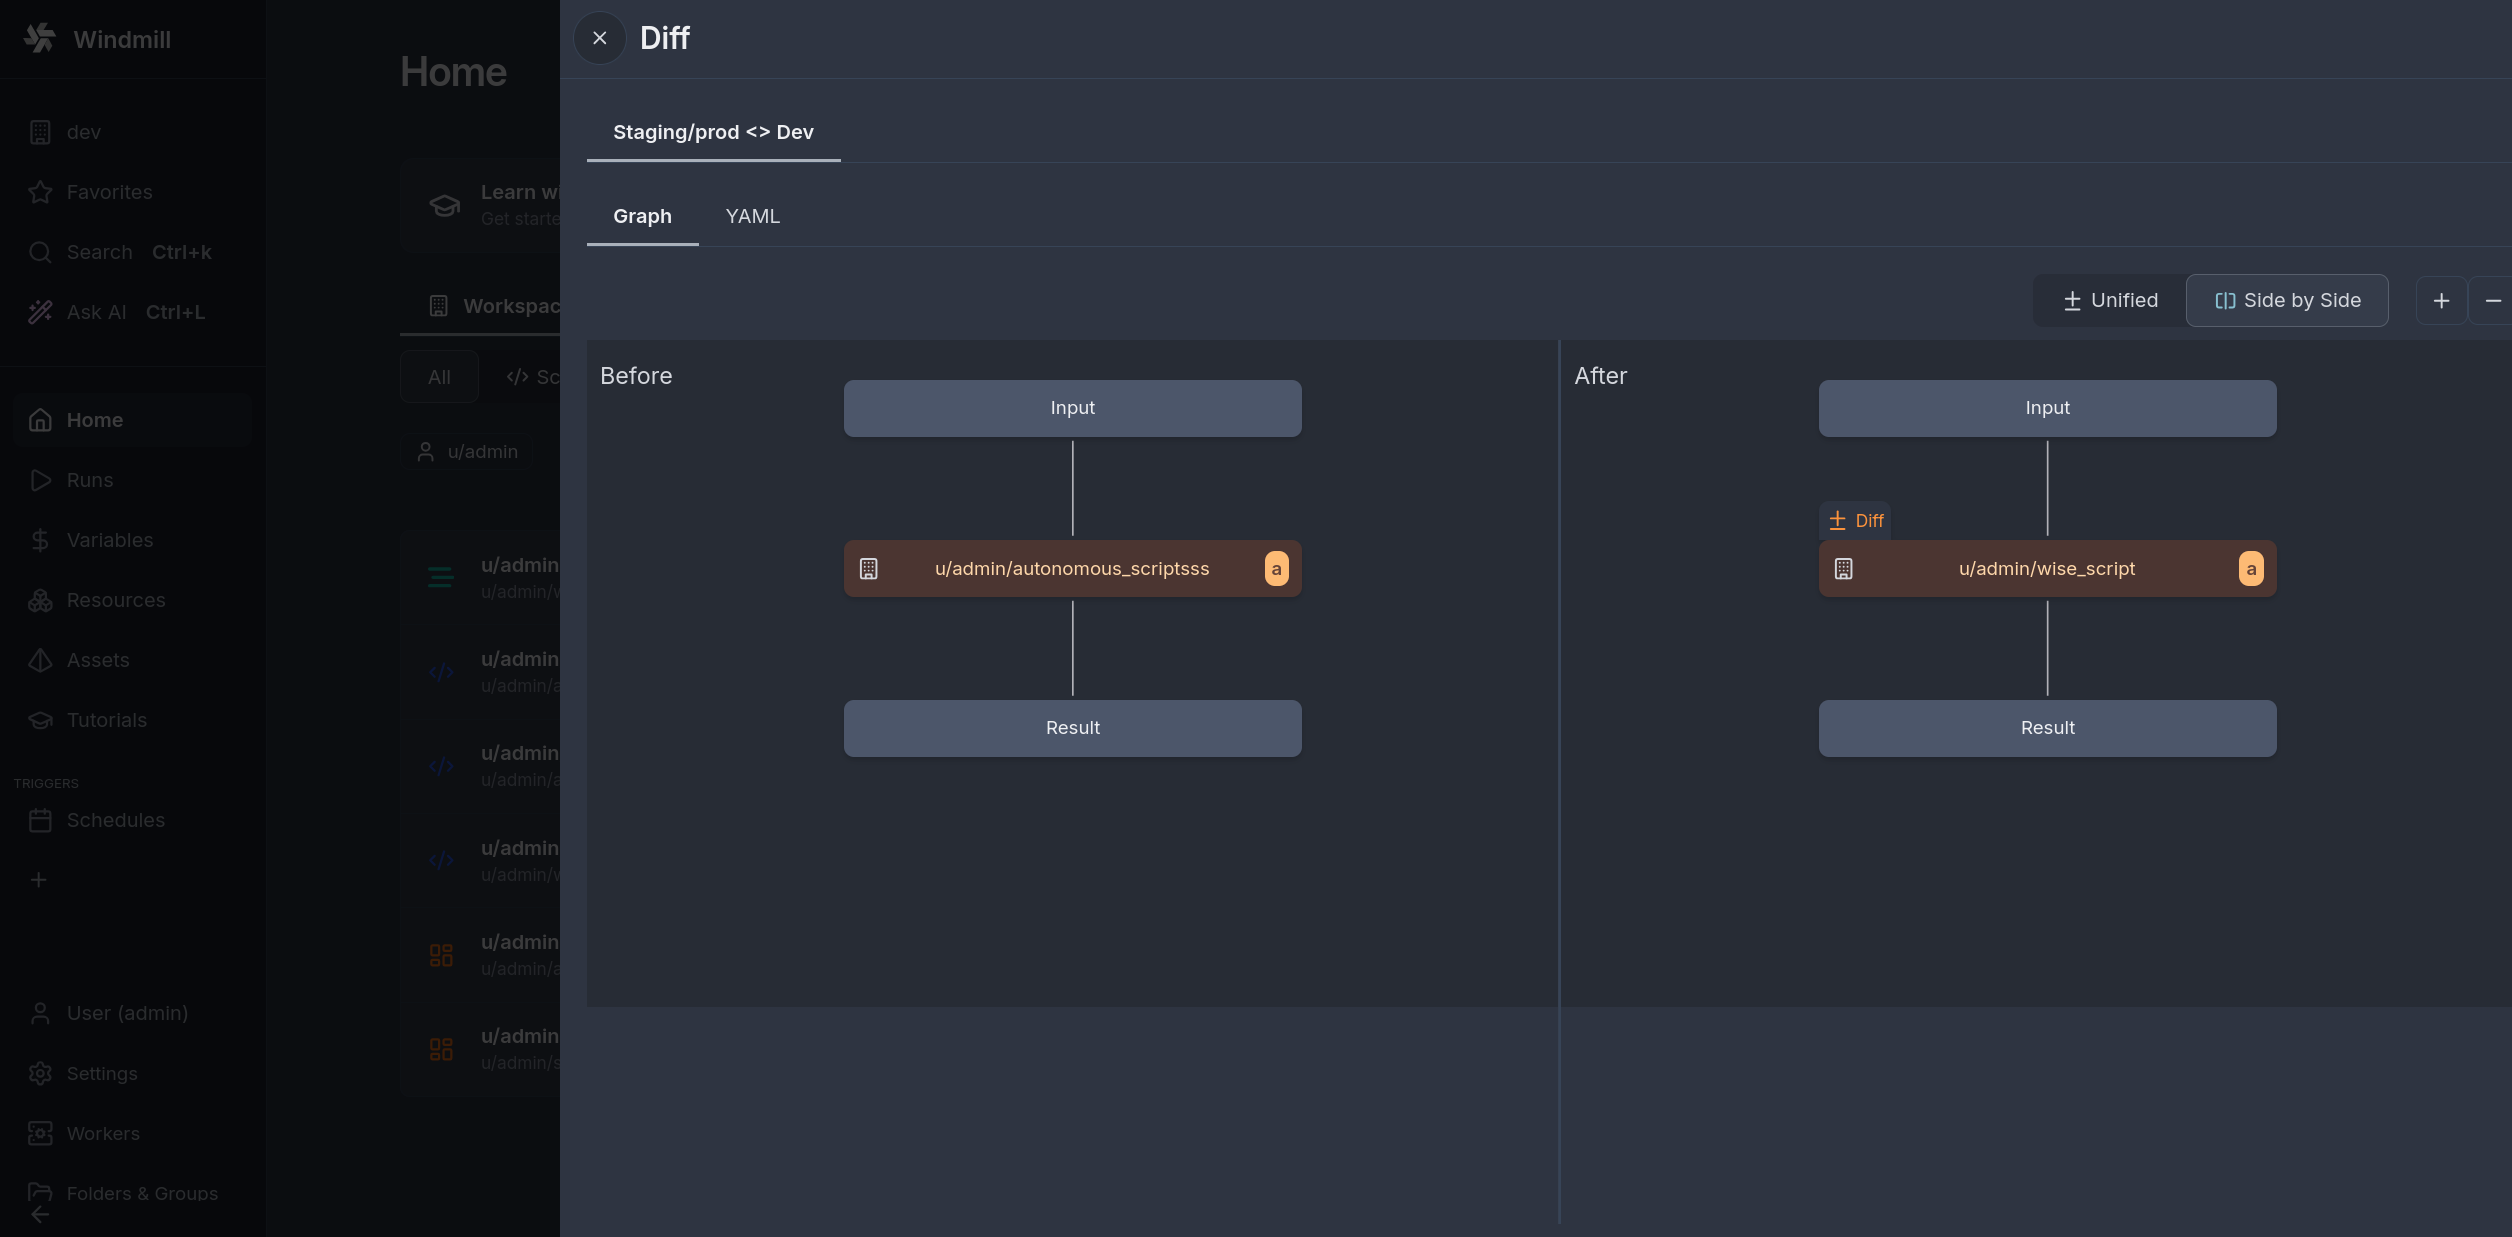
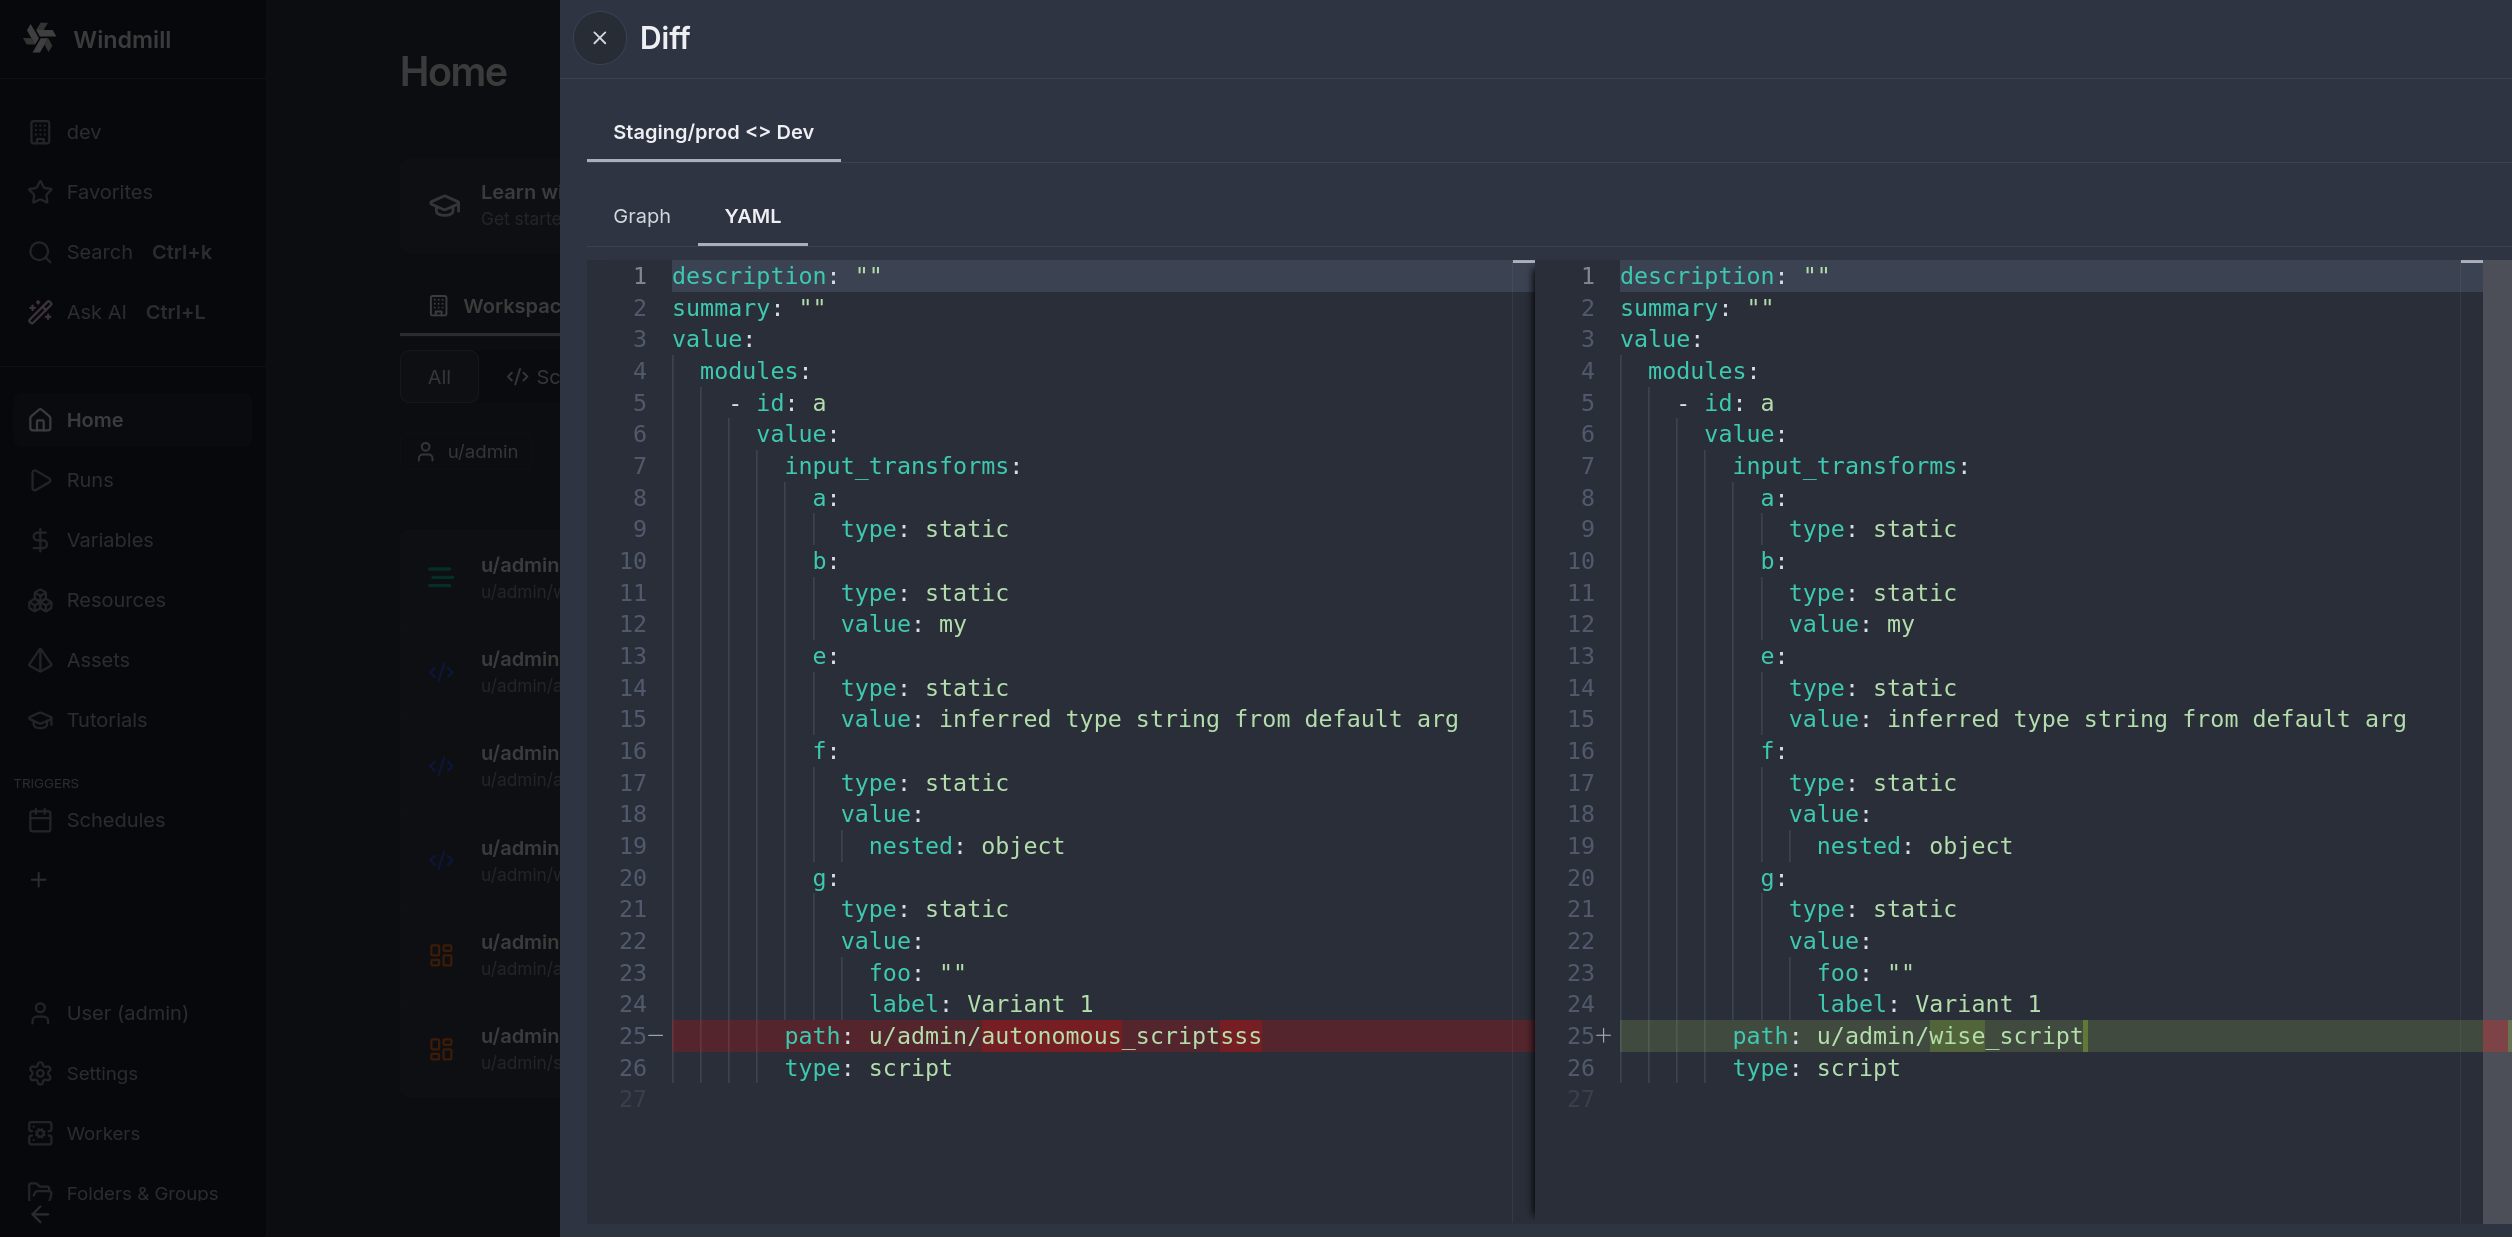
Shareable page
A static page is created for each potential deployment to Staging/Prod.
This can be useful for non-admin (for example, operators) to share a page to properly-permissioned users to have them review or do the deployment.
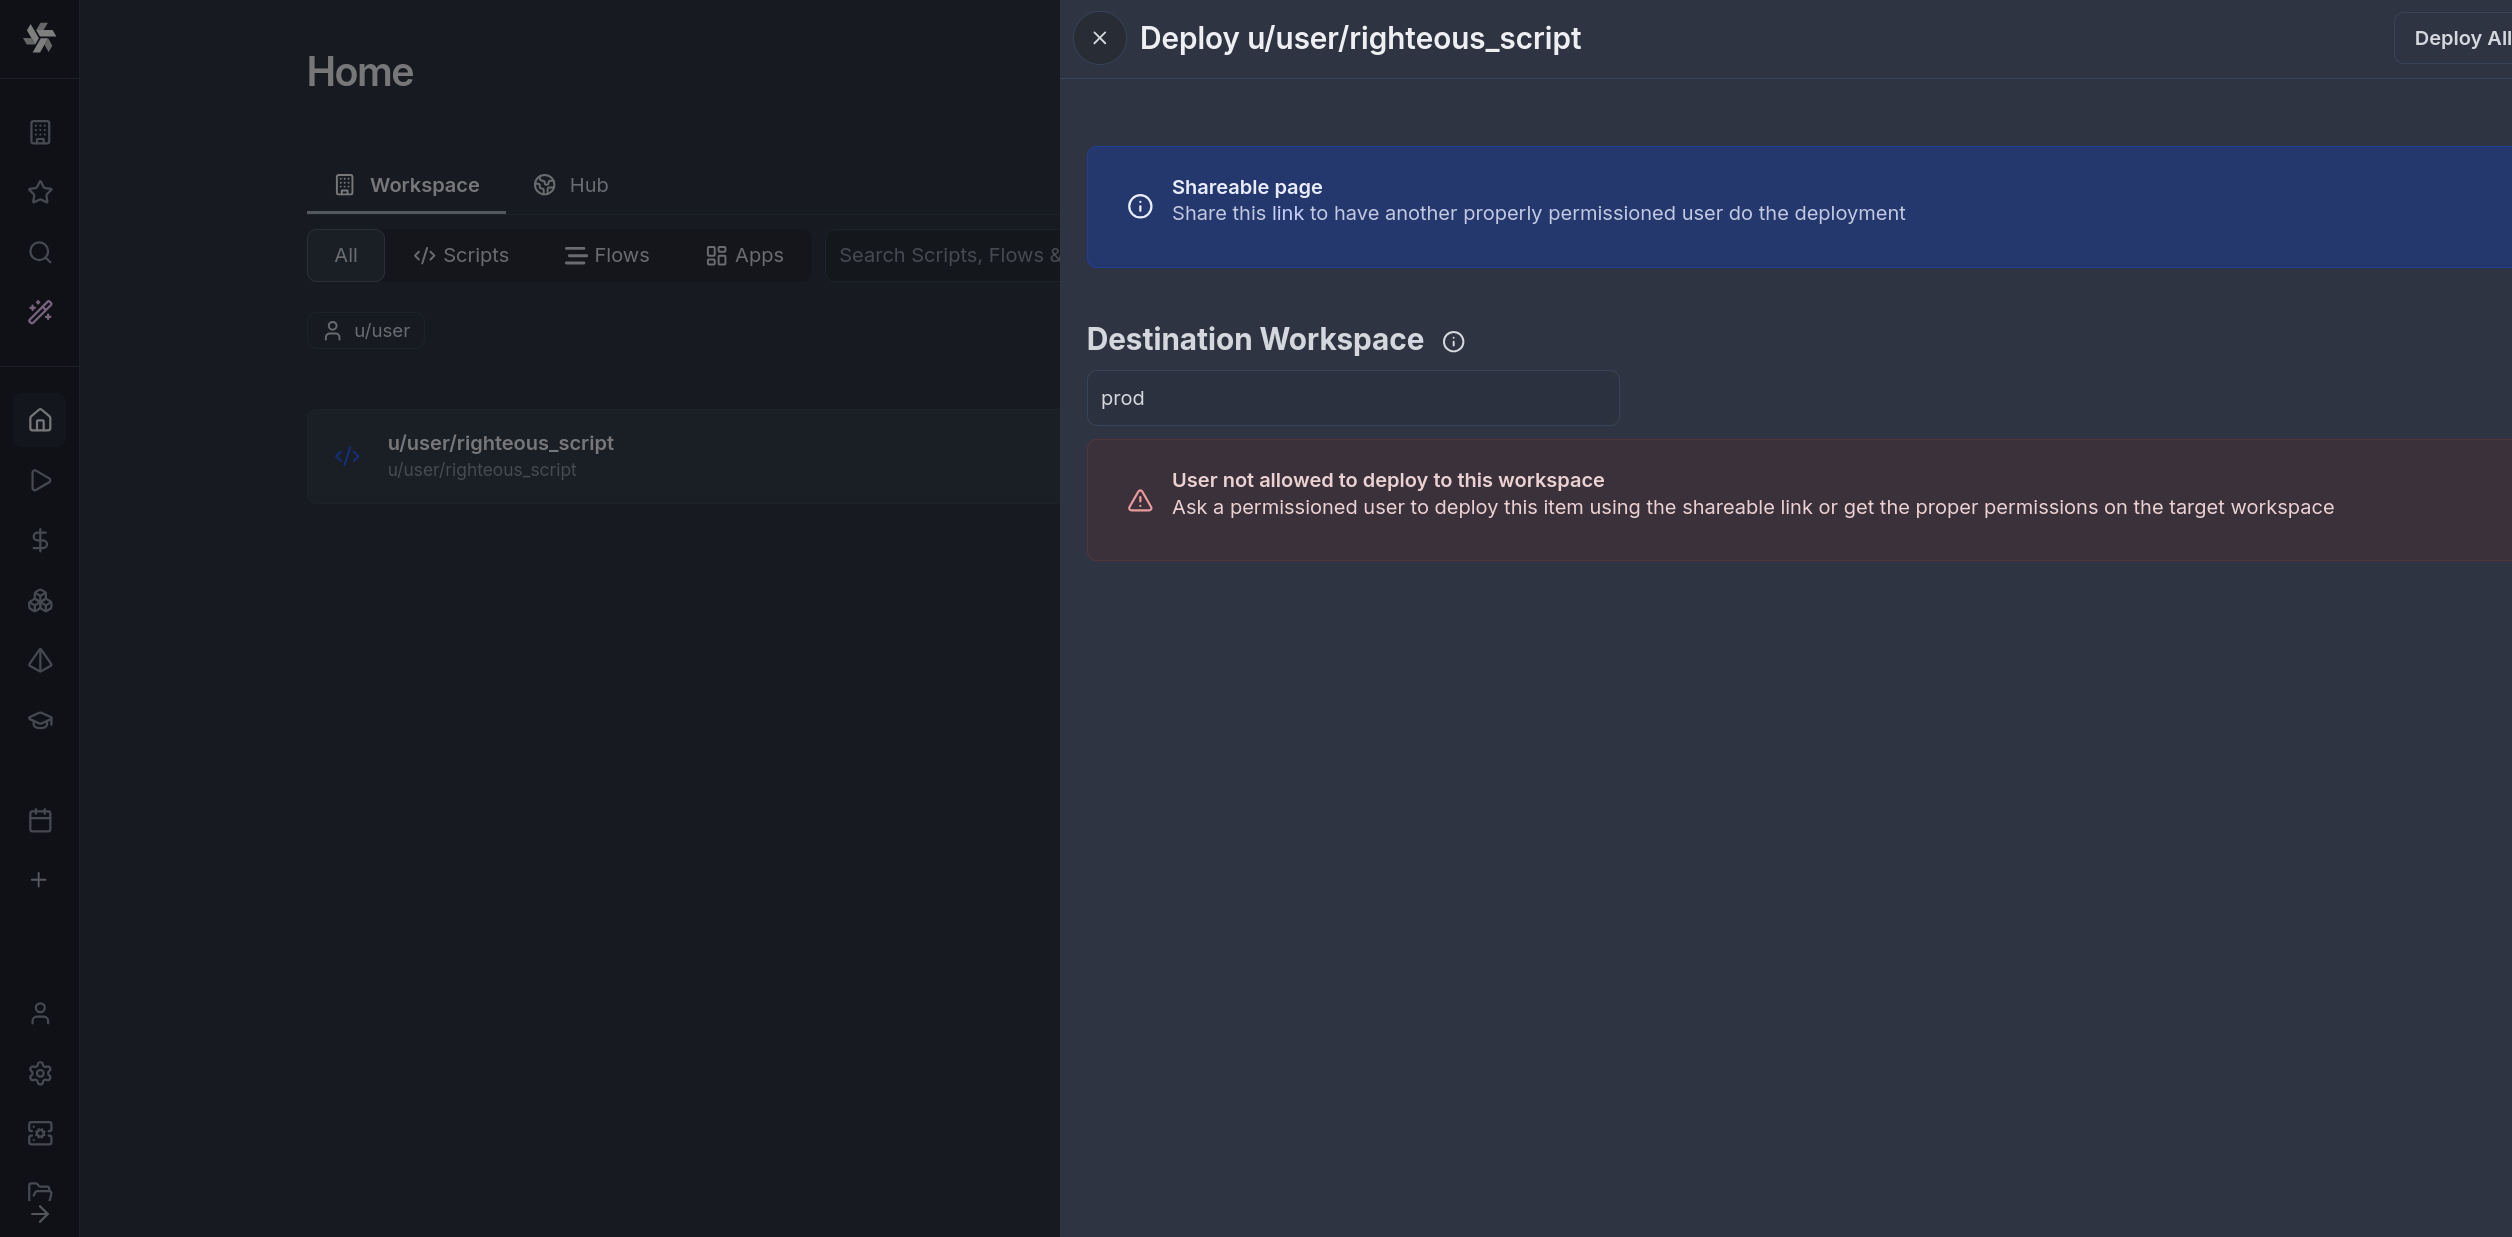
Even users who are not admin can see the "Deploy to staging/prod", from where they can get the link of the shareable page.
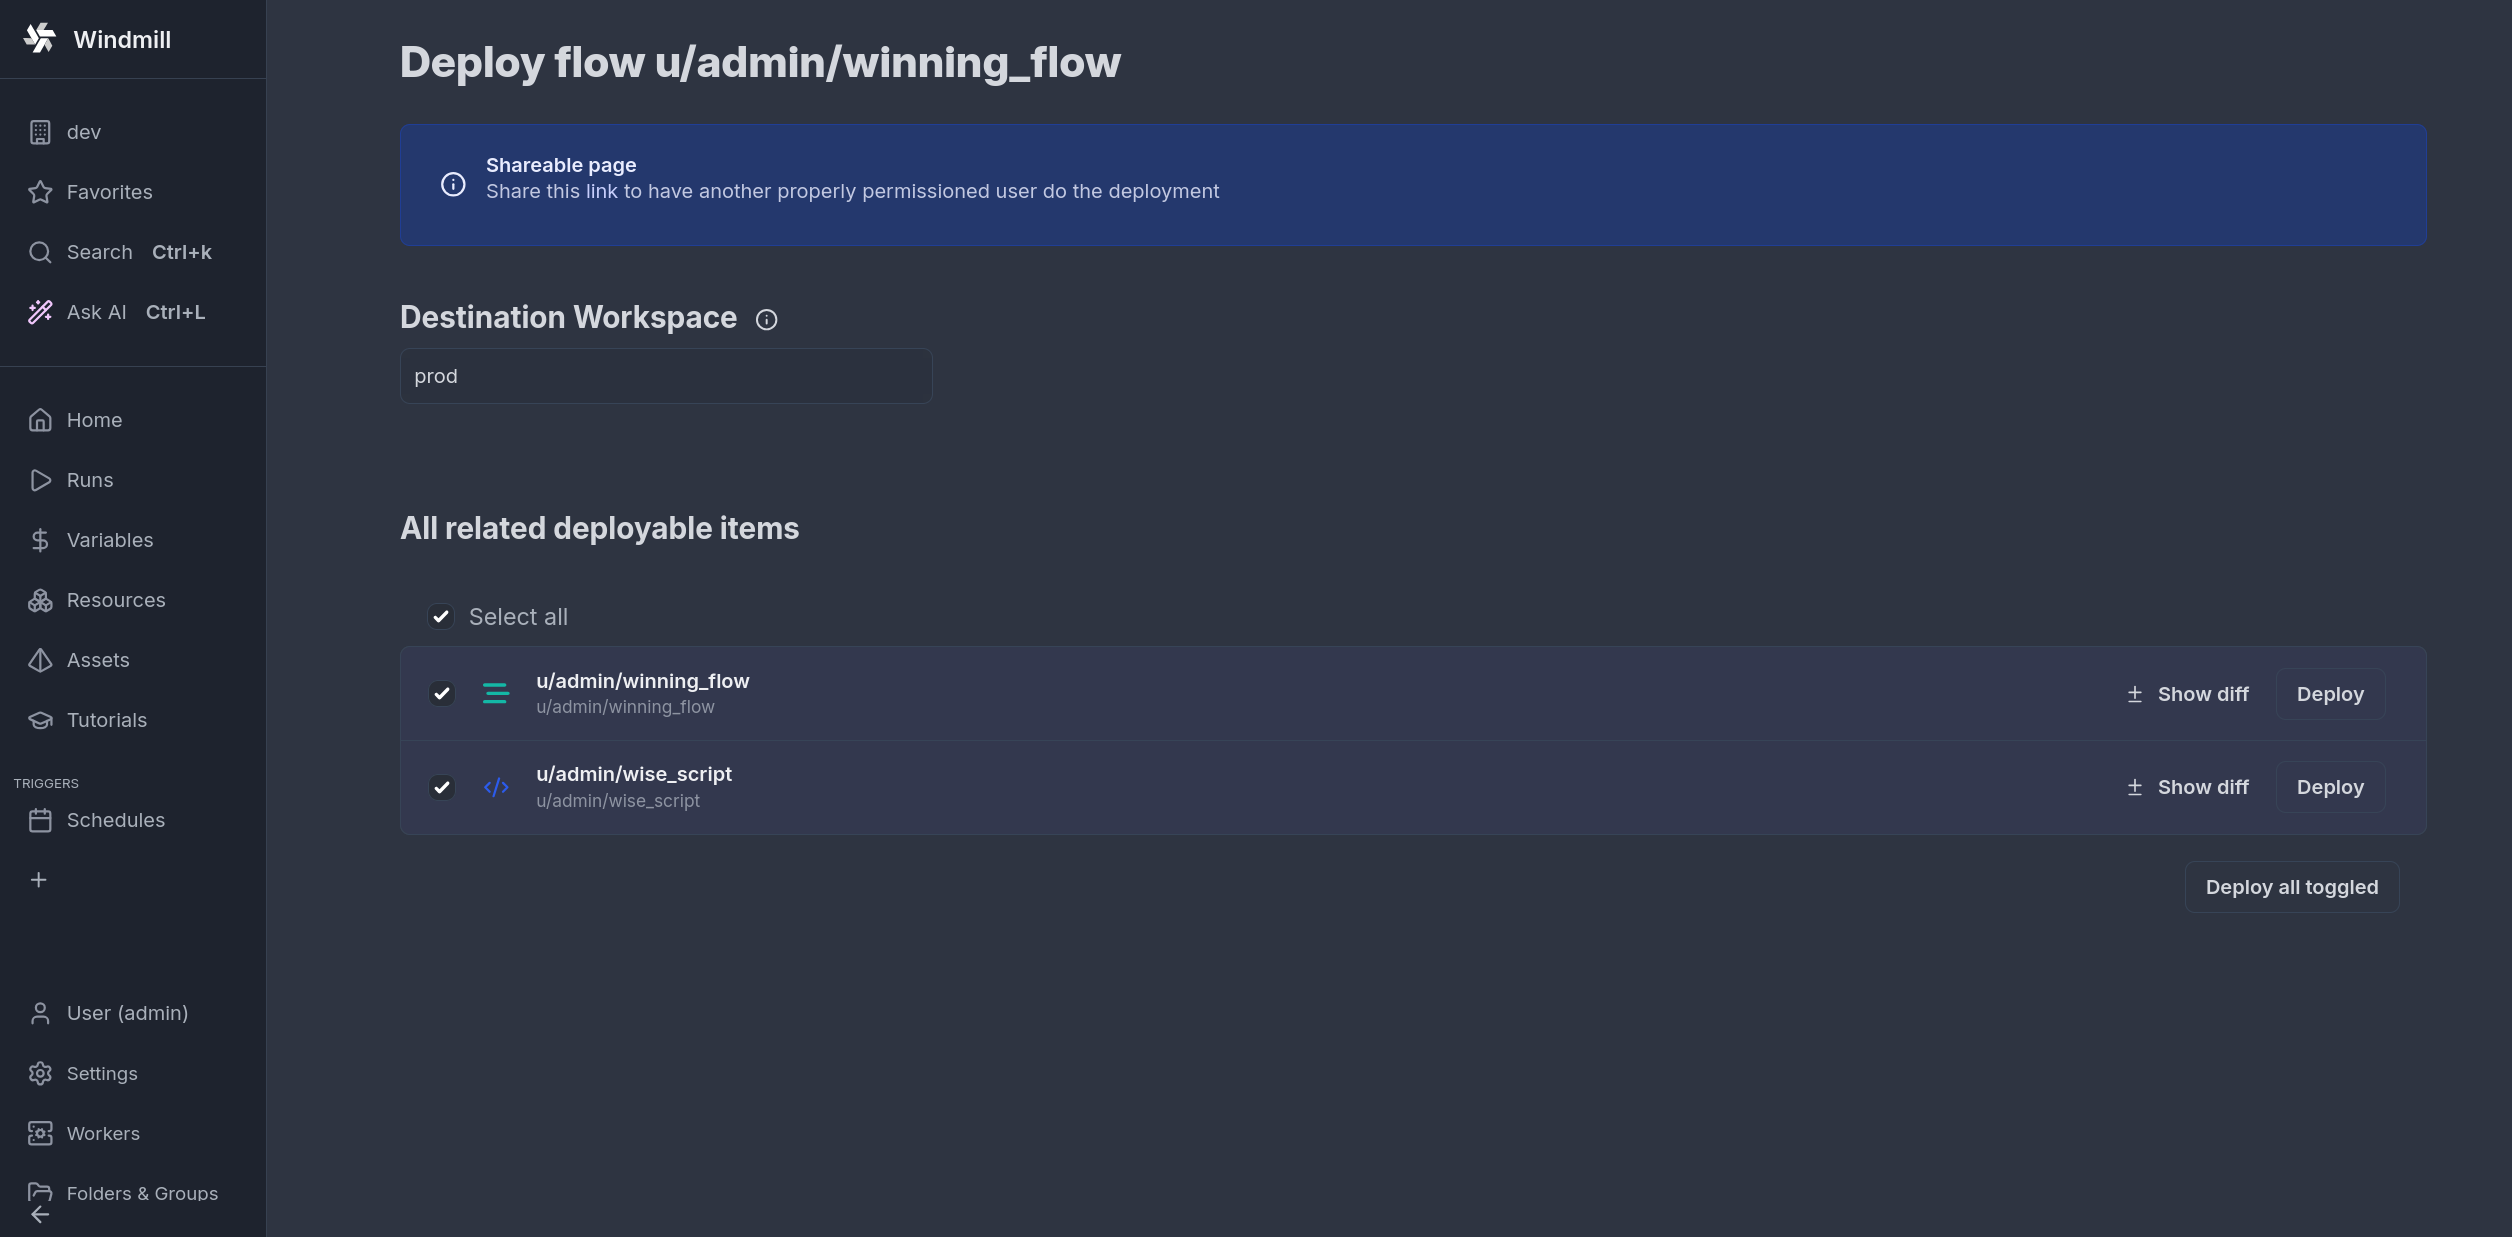
This page then allows users with the right permissions to deploy the given items.
Upgrading from the deploy target setting
Before Windmill 1.776.0, the deployment target was named in a separate Deployment UI settings tab and could be any workspace you belonged to. That setting is gone: the target is the workspace's parent, and the tab is folded into Workspace settings -> Dev workspace.
There is nothing to do. A staging workspace that was the only one deploying into prod becomes prod's dev workspace on upgrade, and Deploy to staging/prod behaves as before.
Rare cases where the pair did not convert
Both are named individually in the migration logs.
- Several workspaces deployed into the same target. Only one can be the dev workspace of a given parent, so each becomes a plain fork instead. Their
$workspacejob tags then resolve to the parent, and their git sync deploys move to awm-fork/**branch with no promotion mode. - The link could not be converted (target missing or archived, self-reference, source already a fork of something else, cycle) and was dropped. Deploying reports
Staging/Prod deploy not set up.
Either way the fix is one attach, as an admin of both workspaces: on the prod workspace, Workspace settings -> Dev workspace -> Attach an existing workspace as dev. The environment label is fixed once set, and the two lock toggles default to on, which is stricter than the old setup: turn them off to keep the previous behaviour.
A converted workspace is parent-managed, as attaching a dev workspace makes it, so its git sync promotion repositories are removed and automatic pull and fork PRs turned off. If the pair promoted through git rather than through this UI, keep the workspaces unrelated and use the git promotion workflow, or a one-off deploy into another workspace.
settings.yaml no longer carries deploy_to. wmill sync pull stops emitting it, and a file that still has it is ignored on push, so committed settings files need no edit.
Merge UI for merging changes done in workspace forks
A fork already deploys into the workspace it was forked from, so the per-item UI above needs no setup there. On top of it, a fork-specific Compare & Deploy page shows exactly the items that were modified, and lets you update the fork as well as deploy from it.
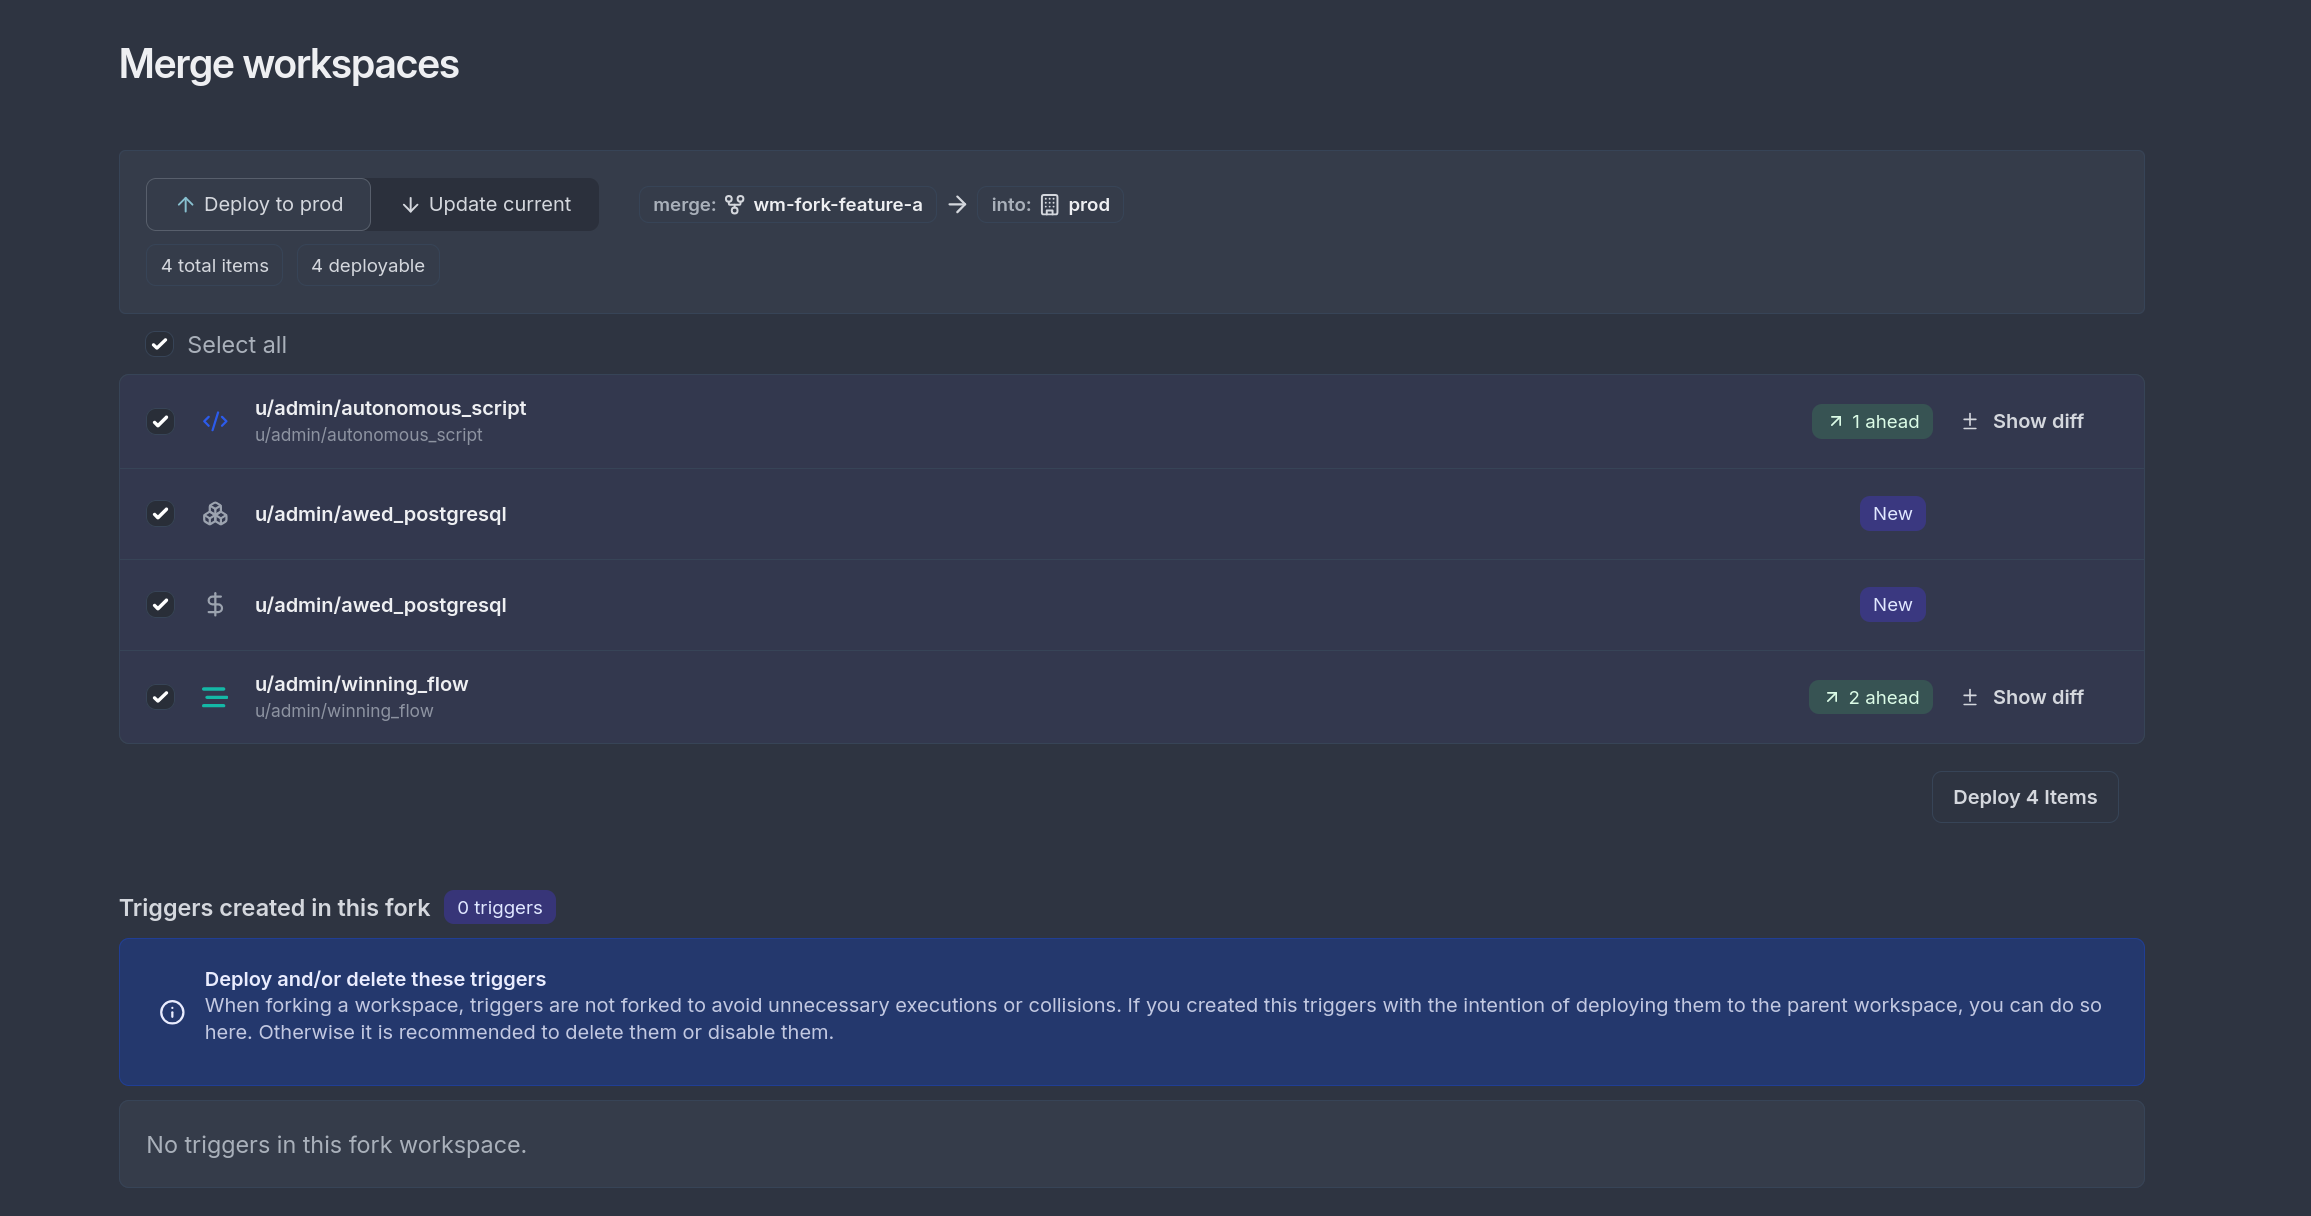
Learn more about merging forks through Merge UI
Deploying into another workspace
For a one-off migration into a workspace that is not the parent, the Compare & Deploy page accepts an arbitrary target: pick it from the destination badge in the merge header. Such a pair has no continuously tracked diff, so you first compute one over every item on both sides, and the comparison is one-way. See merging into a workspace outside the lineage.
Workspace-specific resources and variables
From the Compare & Deploy page, you can mark a resource or variable as workspace-specific so each environment keeps its own value. A workspace-specific item is excluded from the diff entirely, so promoting code never overwrites the per-environment value. When the item exists on only one side, a strictly create-only "Create in <other>" action seeds a copy (including secrets) without overwriting an existing target. This is most useful with a dev workspace paired with a prod workspace.
Run on behalf of
When deploying a script, flow, app, or trigger to another workspace, the "run on behalf of" selector lets you choose which user the item will execute as in the target workspace. This is useful for controlling execution permissions across environments.
There are three options:
- Keep the target workspace's existing setting — the item continues running as whatever user was previously configured in the target workspace. This is the default for items that already exist there.
- Use yourself — the item will run as your own user in the target workspace.
- Pick any user from the target workspace — select a specific user (e.g. a dedicated service account) for the item to run as.
Selecting a user other than yourself requires admin rights or membership in the wm_deployers group in the target workspace.
For production workspaces, consider creating dedicated virtual users scoped to specific responsibilities. See Permission compartmentalization with virtual users for the recommended pattern.
For CLI / CI/CD deploys into multi-workspace setups, you can also pre-configure per-folder defaults so newly deployed items pick up the right owner automatically — see per-folder ownership defaults in the Stage 4 setup.