VS Code extension
The Windmill VS Code extension allows you to build scripts and flows in the comfort of your VS Code or Cursor editor, while leveraging Windmill UIs for test & flows edition.

The extension can be used in particular from a repository synchronized to a Windmill instance to develop scripts & flows locally while keeping them synced to your workspace.
Windmill has its own IDE for creating scripts and flows from the Windmill application (cloud or self-hosted).
The Windmill UI allows you to edit directly the deployed scripts & flows, which is great for maintenance and quick prototyping.
However in many production settings it is more common to version everything from Git and to that end we have a CLI to sync a workspace to a local directory and the inverse operation (deploy local directory to a workspace). With this extension, you can efficiently edit scripts & flows directly from there.
To run scripts locally, see Run locally.
Installation
First of all, have your workspace synced locally with Windmill CLI.
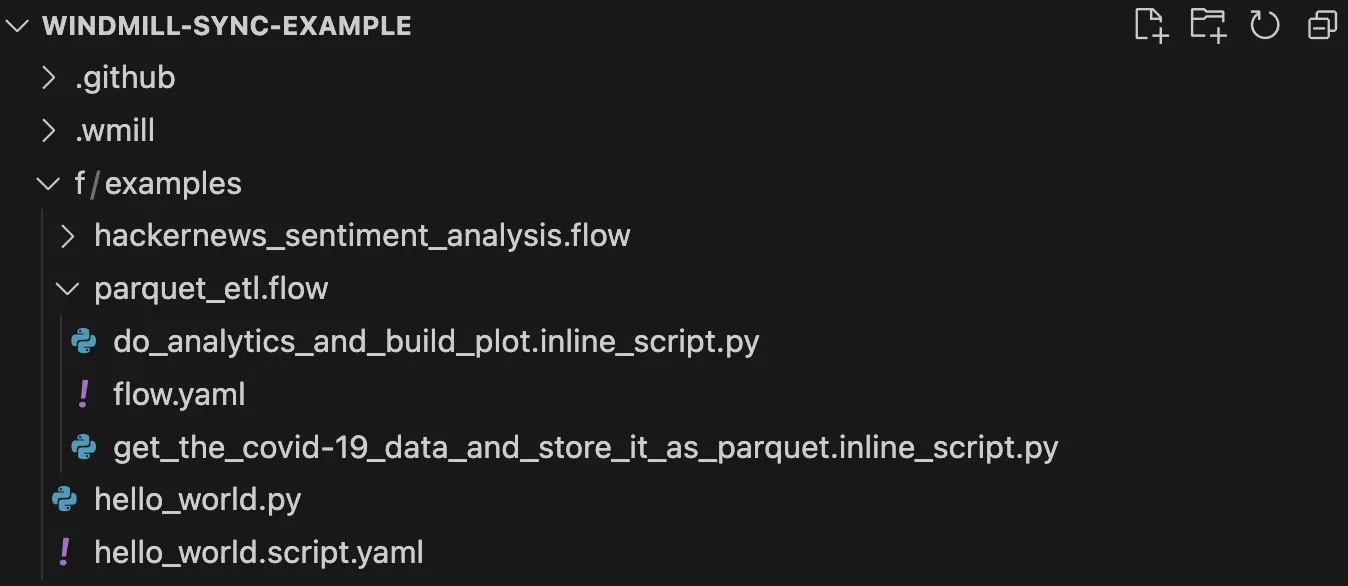
Example repo opened in VS Code. We see 2 flows and 1 script, the flows are their own folders, each step in a flow is a separate file in their respective language. Scripts have their metadata in a separate file.
With wmill sync pull and wmill sync push you can synchronize your remote workspace to a local directory which you would version with GitHub / GitLab.
Then you can:
-
Install the extension.
-
From any script file, use
> Windmill: Run preview in the current editoror Ctrl+Enter and Shift+Enter to generate the UI preview (provided that the script meets the few rules required by Windmill).
All details to set up the workspace folder:
Actions
The preview & run will work for any script meeting the specific language requirements (main function, imports) and being named with the dedicated file extension (.py, .go etc.). For scripts in Deno, name the file [name].deno.ts, ".ts" being by default Bun (configurable with the defaultTs field in your wmill.yaml).
The extension will split your screen and display a panel. That panel will update automatically based on the edited document on the left.
- When editing a script (or a flow step), you see the script preview UI with the auto-inference of the parameters.
- When editing a flow YAML, you see the flow builder and the flow test UI.
In particular:
Test scripts, flows and flows steps
Once you have your scripts and flows locally (either pulled from a remote workspace or created from scratch), you can test them directly from VS Code.
Update UI from YAML
Editing the YAML definition of a flow instantly updates the rendered graph
Update YAML from UI
Editing the flow from the UI immediately modifies the YAML definition
Flow YAML validation
The VS Code extension includes syntax validation for flow.yaml files, making it easier to spot mistakes and ensure your flows are properly formatted before testing or deployment.
This validation is also useful for AI coding assistants that monitor IDE diagnostics, as they can automatically detect and fix flow YAML errors.
Infer lockfile or use current lockfile
With this toggle, you can choose to use the metadata lockfile (derived from workspace dependencies after wmill generate-metadata) instead of inferring them directly from the script.

To learn more about lockfile, see Local development.
Commands
Access these commands through the Command Palette (Ctrl/Cmd+Shift+P):
| Command | Description |
|---|---|
| Windmill: Show Preview | This command launches a preview of your script in a new tab. |
| Windmill: Run preview | Runs the current script and provides a preview within the VS Code environment. This feature lets you preview your work without leaving your code editor. |
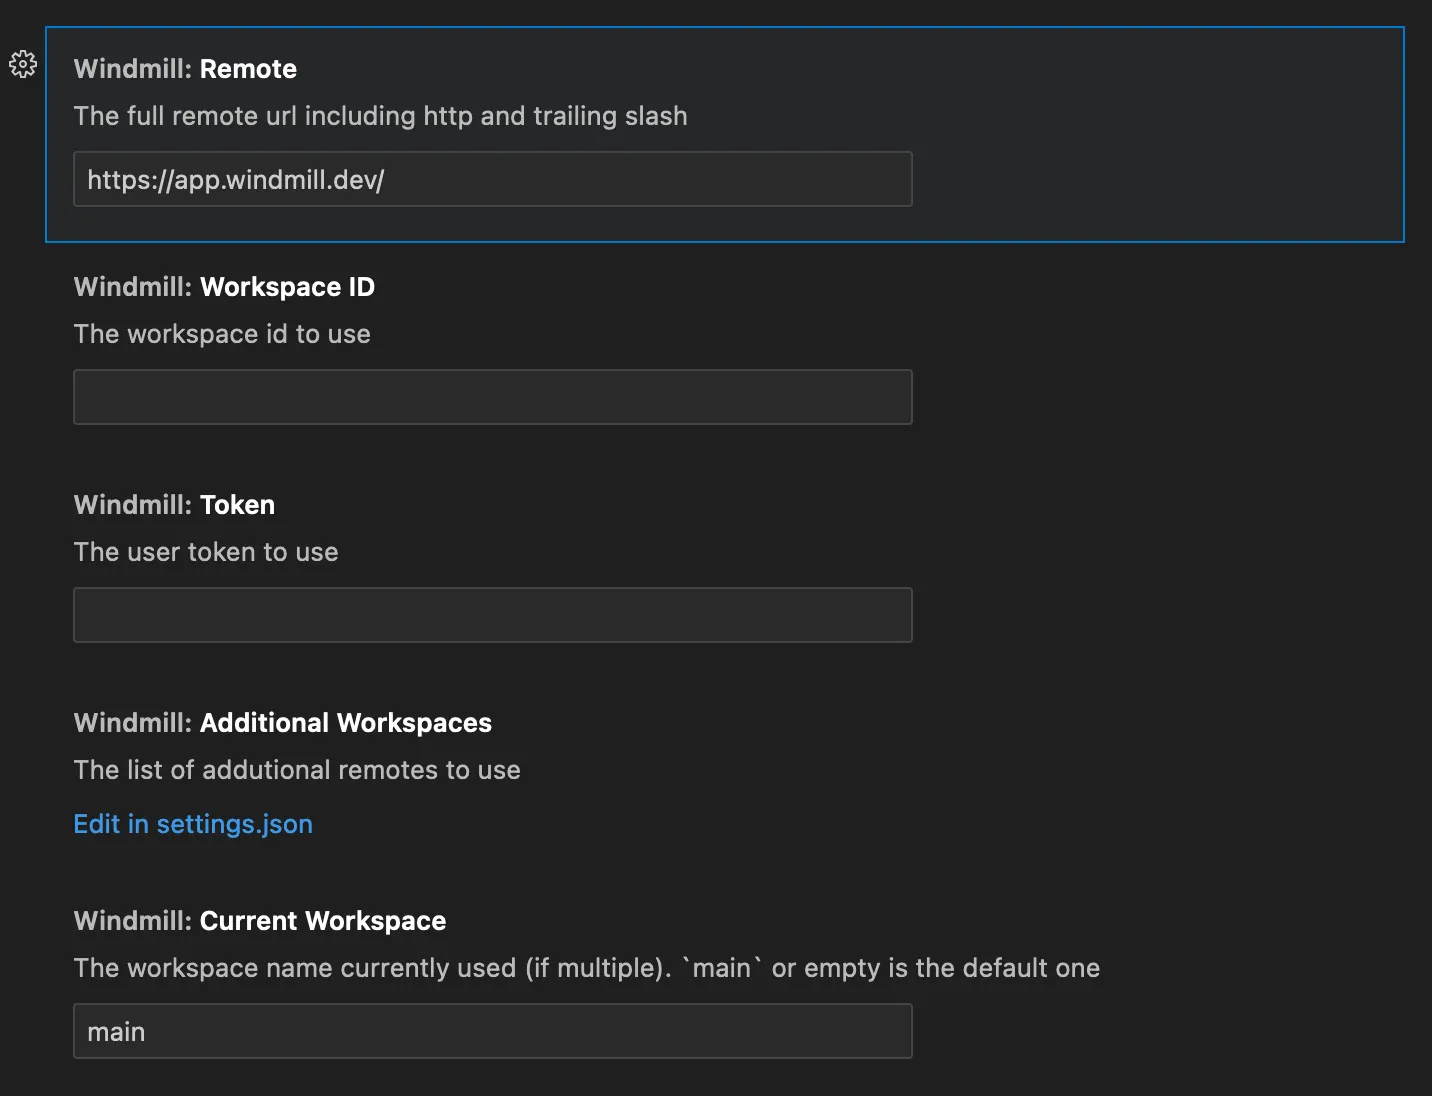
| Windmill: Configure remote, workspace, and token | Opens a setup wizard to configure your environment. This includes settings for the remote URL, workspace, and user token. You only need to do this once or when changing your environment settings. |
| Windmill: Switch Windmill workspace | Allows you to switch between different workspaces. |
| Windmill: Add a Windmill workspace | Adds a new workspace to your configuration. |
Settings
The extension automatically uses workspace settings from your Windmill CLI configuration if available. This provides seamless integration between the CLI and VS Code extension without needing to configure settings separately.
The extension provides the following settings:
| Setting | Description |
|---|---|
windmill.remote | The full remote URL including http and trailing slash. By default, it's "https://app.windmill.dev/". |
windmill.workspaceId | The workspace id to use. |
windmill.token | The token to use to authenticate with the remote and workspace. |
windmill.additionalWorkspaces | The list of additional remotes to use. This allows you to set up multiple workspaces for different projects. |
windmill.currentWorkspace | The workspace name currently used (if multiple). main or empty is the default one. |
windmill.configFolder | Override the CLI config folder path to fetch the workspace settings from. |
You can create a user token in the Windmill app. Follow the instructions on the Webhooks docs.
For TypeScript scripts, the Windmill extension will use by default Bun as the runtime. You can change it either per script by using file extension .deno.ts or globally in your wmill.yaml in the field defaultTs.